Horizontal lines in Word document is used often in our daily work. As we already know that we can we can quickly insert a horizontal line to a Word document by typing three hyphens and pressing Enter. However, there are more tricks to do that job. Some line keyboard shortcuts and a built-in feature offered by Microsoft Word enables us to add predefined but artistic (fancy) lines.
Insert Horizontal Lines from Keyboard
Some basic horizontal lines can be easily inserted through some keyboard shortcuts. The image below shows some samples for you. By using these keyboard shortcuts, we can fast insert horizontal lines into Word dcument.
Insert Horizontal Lines from Keyboard
Some basic horizontal lines can be easily inserted through some keyboard shortcuts. The image below shows some samples for you. By using these keyboard shortcuts, we can fast insert horizontal lines into Word dcument.
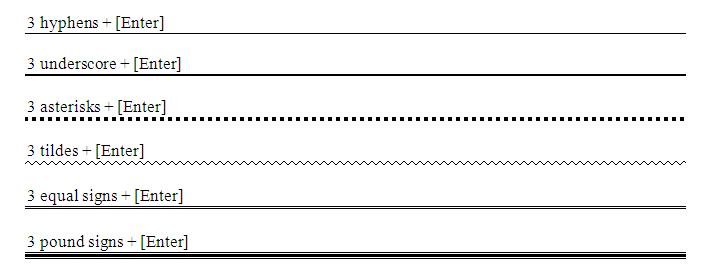
Horizontal-Line-1
However, if you dislike this feature, you can turn it off as follows:
In Word 2003, select AutoCorrect from the Tools menu. On the AutoFormat As You Type tab, uncheck Border Lines in the Apply As You Type section.
In Word 2007, click the Office button and go to Word Options. In the AutoCorrectOptions section, click AutoCorrectOptions. Then, on the AutoFormat As You Type tab, uncheck Border Lines in the Apply As You Type section.
In Word 2010, go to File tab and click Options. In the left pane, click Proofing. In the AutoCorrectOptions section, click
AutoCorrectOptions. Then, on the AutoFormat As You Type tab, uncheck Border Lines in the Apply As You Type section.
Insert Horizontal Line via Word Built-in Feature
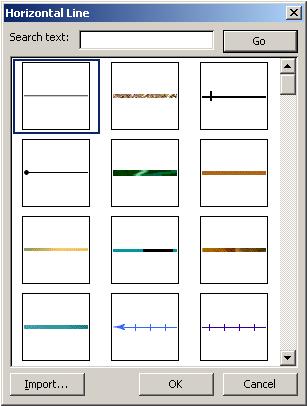
Those horizontal lines are certainly functional, but Word built-in feature can draw lines that are a step (or two or three) up from the basic lines shown above.
From the Format menu, select Borders and Shading and we will find a Horizontal Line button at the bottom of the resulting dialog box. After all horizontal lines are loaded, select one and double-click to insert. We can choose single or several lines. In Word 2007 and 2010, we need go to Home tab and click the Borders and Shading drop down (in the Paragraph group) and select Borders and Shading.
In Word 2003, select AutoCorrect from the Tools menu. On the AutoFormat As You Type tab, uncheck Border Lines in the Apply As You Type section.
In Word 2007, click the Office button and go to Word Options. In the AutoCorrectOptions section, click AutoCorrectOptions. Then, on the AutoFormat As You Type tab, uncheck Border Lines in the Apply As You Type section.
In Word 2010, go to File tab and click Options. In the left pane, click Proofing. In the AutoCorrectOptions section, click
AutoCorrectOptions. Then, on the AutoFormat As You Type tab, uncheck Border Lines in the Apply As You Type section.
Insert Horizontal Line via Word Built-in Feature
Those horizontal lines are certainly functional, but Word built-in feature can draw lines that are a step (or two or three) up from the basic lines shown above.
From the Format menu, select Borders and Shading and we will find a Horizontal Line button at the bottom of the resulting dialog box. After all horizontal lines are loaded, select one and double-click to insert. We can choose single or several lines. In Word 2007 and 2010, we need go to Home tab and click the Borders and Shading drop down (in the Paragraph group) and select Borders and Shading.
Horizontal-line-2
By using these 2 Word tricks to insert horizontal lines, we can create different types of line at will. And I believe this can make your document a much better appearance.

 RSS Feed